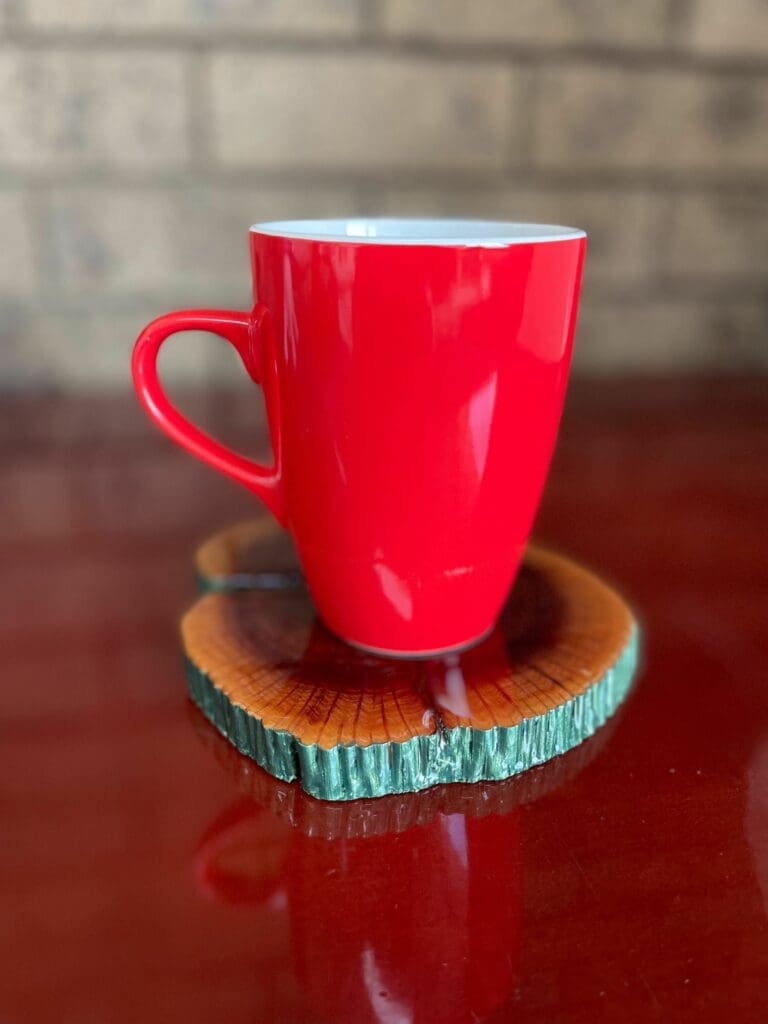
Resin Coasters Done Right: Guide to Stone Coat Epoxy
15
May
Resin coasters look simple. A timber blank, a slick of clear epoxy, a few pigment swirls, done. And in fairness, that’s roughly the process. But coasters are one of those projects where the small surface area magnifies every choice you make: the resin you pick, the substrate you pour onto, the room temperature on the day, and the kind of mug your customer eventually puts down on top of it.We get enquiries every week from makers who are either about to start a coaster run or who’ve already finished one and aren’t happy with the result. The honest truth is that nearly every disappointment we hear about comes back to one of three things: the wrong resin for the colour palette, an unrealistic expectation of how epoxy behaves under a hot mug, or a workspace that was simply too cold on pour day.So instead of writing another generic “how to pour resin” piece, we’ve put together the guide we wish every coaster-maker read before their first kit arrived. Whether you’re a hobbyist making a Mother’s Day set or a maker building a side income on Etsy, the same principles apply, you’ll just weigh them differently.
If you’re a hobbyist pouring for fun (or for gifts)
Start with one kit. Pour onto the exact substrate you plan to use for the real thing, a single ceramic tile, a single timber blank, whatever you’ve settled on. Don’t pour onto cardboard “to practise” and then jump straight to your final pieces. The substrate is half the story.Pick a tier you’re comfortable losing if it doesn’t go to plan. Our Stone Coat Art Coat and Stone Coat Countertop Epoxy are both forgiving enough for first-timers, and we’ll cover which one suits your palette below.And before you give a finished coaster to someone, put a hot mug on one of your trial pieces yourself. Leave it for ten minutes. Pick it up. Look at the surface. That’s the test that matters, not what a TDS says, not what an Instagram reel shows. Your kitchen, your mug, your coaster.If your test piece comes through it, you’ve got a process. If it doesn’t, you’ve learnt something cheap.
If you’re selling coasters
The variables that are nice-to-know for a hobbyist become non-negotiable for a maker selling product. You’re putting your name on every piece, and the person buying a four-pack of coasters off your stall has a very specific expectation: they think it’ll handle their morning coffee forever.Three things we strongly recommend:
Pick one substrate and stick to it. Ceramic tile, MDF, hardwood, slate, each one behaves differently with epoxy. Choose one, master it, then expand. Mixing substrates mid-batch is how inconsistency creeps into a product line.
Pour a witness piece in every batch. Same resin, same ratio, same conditions, but kept on your bench, not sold. When a customer comes back with a complaint, you’ve got an identical reference to inspect.
Be upfront with buyers about heat. A short care card in the packaging, “use as a coaster for cold and warm drinks; avoid prolonged contact with very hot items”, sets expectations correctly and protects you from the one-star review that starts with “I put a fresh espresso on it…”. This isn’t a weakness in the resin; it’s how all hand-poured epoxy systems behave.
We’ll come back to the heat question in a minute, because it’s the single biggest source of confusion in this category.
Which resin: Art Coat or Countertop Epoxy?
Both Stone Coat resins are designed for coating applications, and both list coasters as a suitable project on the Stone Coat technical sheets. The split is mainly about colour and UV.
The finished coaster will live somewhere it’ll catch indirect sunlight (a coffee table near a window, a verandah, a kitchen bench)
Art Coat is formulated with better UV resistance, which means clear and light-coloured pours hold their tone for longer instead of drifting amber over time. If your design relies on staying optically clean, alcohol-ink florals, pale marbling, snow-white bases, Art Coat is the safer pick.
The design masks any micro-yellowing that might develop over years
Countertop is the workhorse Stone Coat product. It’s what most countertop installers in the US use day-in, day-out, and on a coaster it gives you a thick, self-levelling pour with a great gloss. With dark pigment loadings, the slight UV difference between the two products simply isn’t visible.A quick decision tree: light or clear → Art Coat. Dark or heavily pigmented → Countertop is fine. If you’re not sure, Art Coat is the safer default.
The heat-resistance question (and why it confuses everyone)
This is the section worth slowing down for, because it’s the single biggest reason people end up disappointed with an epoxy coaster.You’ll see two numbers quoted for Stone Coat resins:
HDT (Heat Deflection Temperature): 54°C (130°F)
Heat resistance: 232°C (450°F)
Both numbers are correct. They measure completely different things.
HDT is the lab test that matters for coasters
HDT (Heat Deflection Temperature) is a standardised lab test. It measures the temperature at which a material starts to bend, distort, or deform while heat and weight are applied at the same time. Heat plus load. Not heat alone.That’s exactly what a hot mug on a coaster is: heat, plus the weight of the mug, sitting on one small contact patch. So if you want to know how a coaster will behave under a fresh cup of coffee, HDT is the honest number, and that number for Stone Coat is 54°C.A freshly poured espresso comes out of the machine somewhere around 75-80°C. By the time it’s been carried to the table it’s cooler, but the base of the cup will still sit above 54°C for the first few minutes. Which means under that mug, the resin surface can soften slightly, take a faint impression, or hold a ring, particularly if the coaster’s barely a month out of cure and not fully hardened.The good news, and we’ve seen this on our own benches: that soft mark almost always relaxes back out as the surface cools. The resin isn’t damaged; it’s just thermoplastic-ish in that window. But if the customer lifts the mug and looks straight down at the still-warm coaster, they’ll see the impression, and that’s the moment expectations get bruised.
Heat resistance is a broader claim
The 232°C figure on the bottle and website is heat resistance in the general sense: the temperature at which the resin starts to fail: burn, blister, crack, scorch. That’s a useful number if you’re thinking about a brief flame contact or a hot pan being momentarily set down. It is not the number to plan a coaster around.Calling a resin “heat-resistant to 232°C” is technically accurate. Designing a coaster around that figure is a mistake. Always design around HDT.
What this means in practice
For cold drinks, room-temperature glasses, candles in jars, and warm-but-not-hot mugs, a properly cured Stone Coat coaster is comfortably fit for purpose.
For fresh-off-the-machine espresso, very hot tea straight off the boil, or anything taken directly from a stovetop, expect a small temporary mark that should self-relax. If you sell coasters, this is worth saying on the care card.
Full cure matters. Stone Coat’s technical data sheet lists a total cure time of seven days, with maximum hardness developing across the first three. A coaster tested at day three will perform noticeably differently to the same coaster at day seven. Don’t ship coasters out the door before they’ve completed that full seven-day cure.
Stone Coat themselves did a nice short demonstration of the heat/mug behaviour, worth watching here.
The variables that quietly ruin coasters
Beyond resin choice and heat, a handful of process variables make or break the final result. Most are within your control once you know to watch for them.
Workspace temperature. This is the big one as we head into the cooler months. Stone Coat’s TDS specifies an ideal working range of 18-24°C, and to keep the workspace above 18°C for the first 48 hours of cure. Drop below that and you risk slow cure, surface haze, or a tacky finish that never quite levels. A small heater, a hot-box, or simply pouring on a warmer day fixes most cold-weather problems.
Coating thickness. Coasters are thin pours. The TDS recommends no more than 3 mm per layer, with a maximum casting thickness of 3 inches across multiple pours. Heavier coats trap heat from the exotherm and risk yellowing or distortion.
Pigment load. A heavy hand with pigment changes the resin’s chemistry. Follow the dosing guidance on your colour additive, for Polycolor metallic pigment powders, that’s typically 1-2 tablespoons per 16 ounces of mixed epoxy. Going well over the recommendation can leave you with soft, undercured patches.
Mixing. Under-mixed epoxy is the most common cause of soft, sticky patches. Scrape the sides and base of your mixing pot. Mix for the full time the TDS specifies. Then mix again in a second clean pot if you’re being thorough.
Substrate. A ceramic tile will read your resin pour completely differently to a piece of pine. Glazed ceramics tend to bead slightly until you scuff them; soft timbers may need a sealing coat. Always trial on your final substrate.
Want extra durability? The Ultimate Top Coat trade-off
The Stone Coat Ultimate Top Coat is a separate finishing product that adds a tougher, more abrasion-resistant skin over your cured epoxy. On a benchtop it’s brilliant, that’s exactly what it’s built for.On a coaster, it’s a judgement call. The Top Coat doesn’t dry to the same glassy mirror finish you get from a fresh epoxy pour; it has a slightly different surface texture, closer to a satin-tough feel than wet-look gloss. For makers who care about that flawless reflective finish, and most coaster buyers do, this trade-off usually isn’t worth it. Mention it to your customer if they want the toughest possible result and can live with the texture change. Otherwise, lean on proper cure time, sensible care advice, and a great pour.
Ready to pour?
If you’ve made it this far, you’ve already done the hardest part of any resin project: understanding why it works the way it does.
Buy a small kit first, pour onto your real substrate, and put a hot mug on the test piece before you commit to a full run.
If you’d like a hand picking the right tier for your project, drop us a line at [email protected], we’d rather spend five minutes pointing you at the right product than have you start with the wrong one. That’s the whole point of buying from Barnes: you get the technical answer, not the upsell.Happy pouring.