

Creating a resin artwork
Safety First!
Before using our products, please read the SDS and TDS, located under the product description on our websites. Always use resin in a well ventilated, dedicated space, away from children and animals. Use personal protective equipment such as gloves, mask, goggles and apron whilst measuring, mixing, casting or sanding resin. Resin is not recommended for use by children under the age of 18, or during pregnancy.
Get ready to create
Prepare your workspace by covering your work surface with a plastic drop sheet. Elevate your artboard by placing it on an upturned ice-cream container. Make sure the board is level, and at least 20cm back from the edge of the table so resin runoff will not go on the floor.
Choose your colour scheme. We recommend using up to six different colours for your artwork. Use a range of Barnes pigments, dyes and powders to create a layered effect.
If you prefer to only resin the top of your artboard, place painters’ tape firmly around the edge of your piece.
Put on your personal protective equipment, and have your mixing and measuring items at hand, and you are ready to create!
Measuring and Mixing
Measure out equal parts of Barnes Epoxyglass Part A and B separately in the 300ml Measuring Cups. As an example, 300ml of resin would equate to 150ml of Part A, and 150ml of Part B in a 1:1 by volume ratio.
Pour both parts into a 600ml Measuring cup and mix thoroughly for 2-3 minutes. Transfer all resin to a second beaker, to ensure that the product cross links correctly. Mix thoroughly again for another two minutes. You will notice that as you mix the product, any striations through the resin will clear.
Don’t worry if the resin has bubbles or appears to be milky. This will not affect the outcome of your resin artwork
Once part A and B have been mixed you have about 40 minutes of working time depending on the ambient room temperature before the resin starts to set.
Pigmenting and Pouring
Distribute the mixed resin into your 210ml plastic cups. Allocate the amount of resin according to how much of the colour you want more of in your artwork. Add Barnes resin pigments to each of the small plastic cups, mixing until they are blended.
We recommend using Barnes Opaque white resin as a dominant colour if you would like to create resin cells in your artwork.
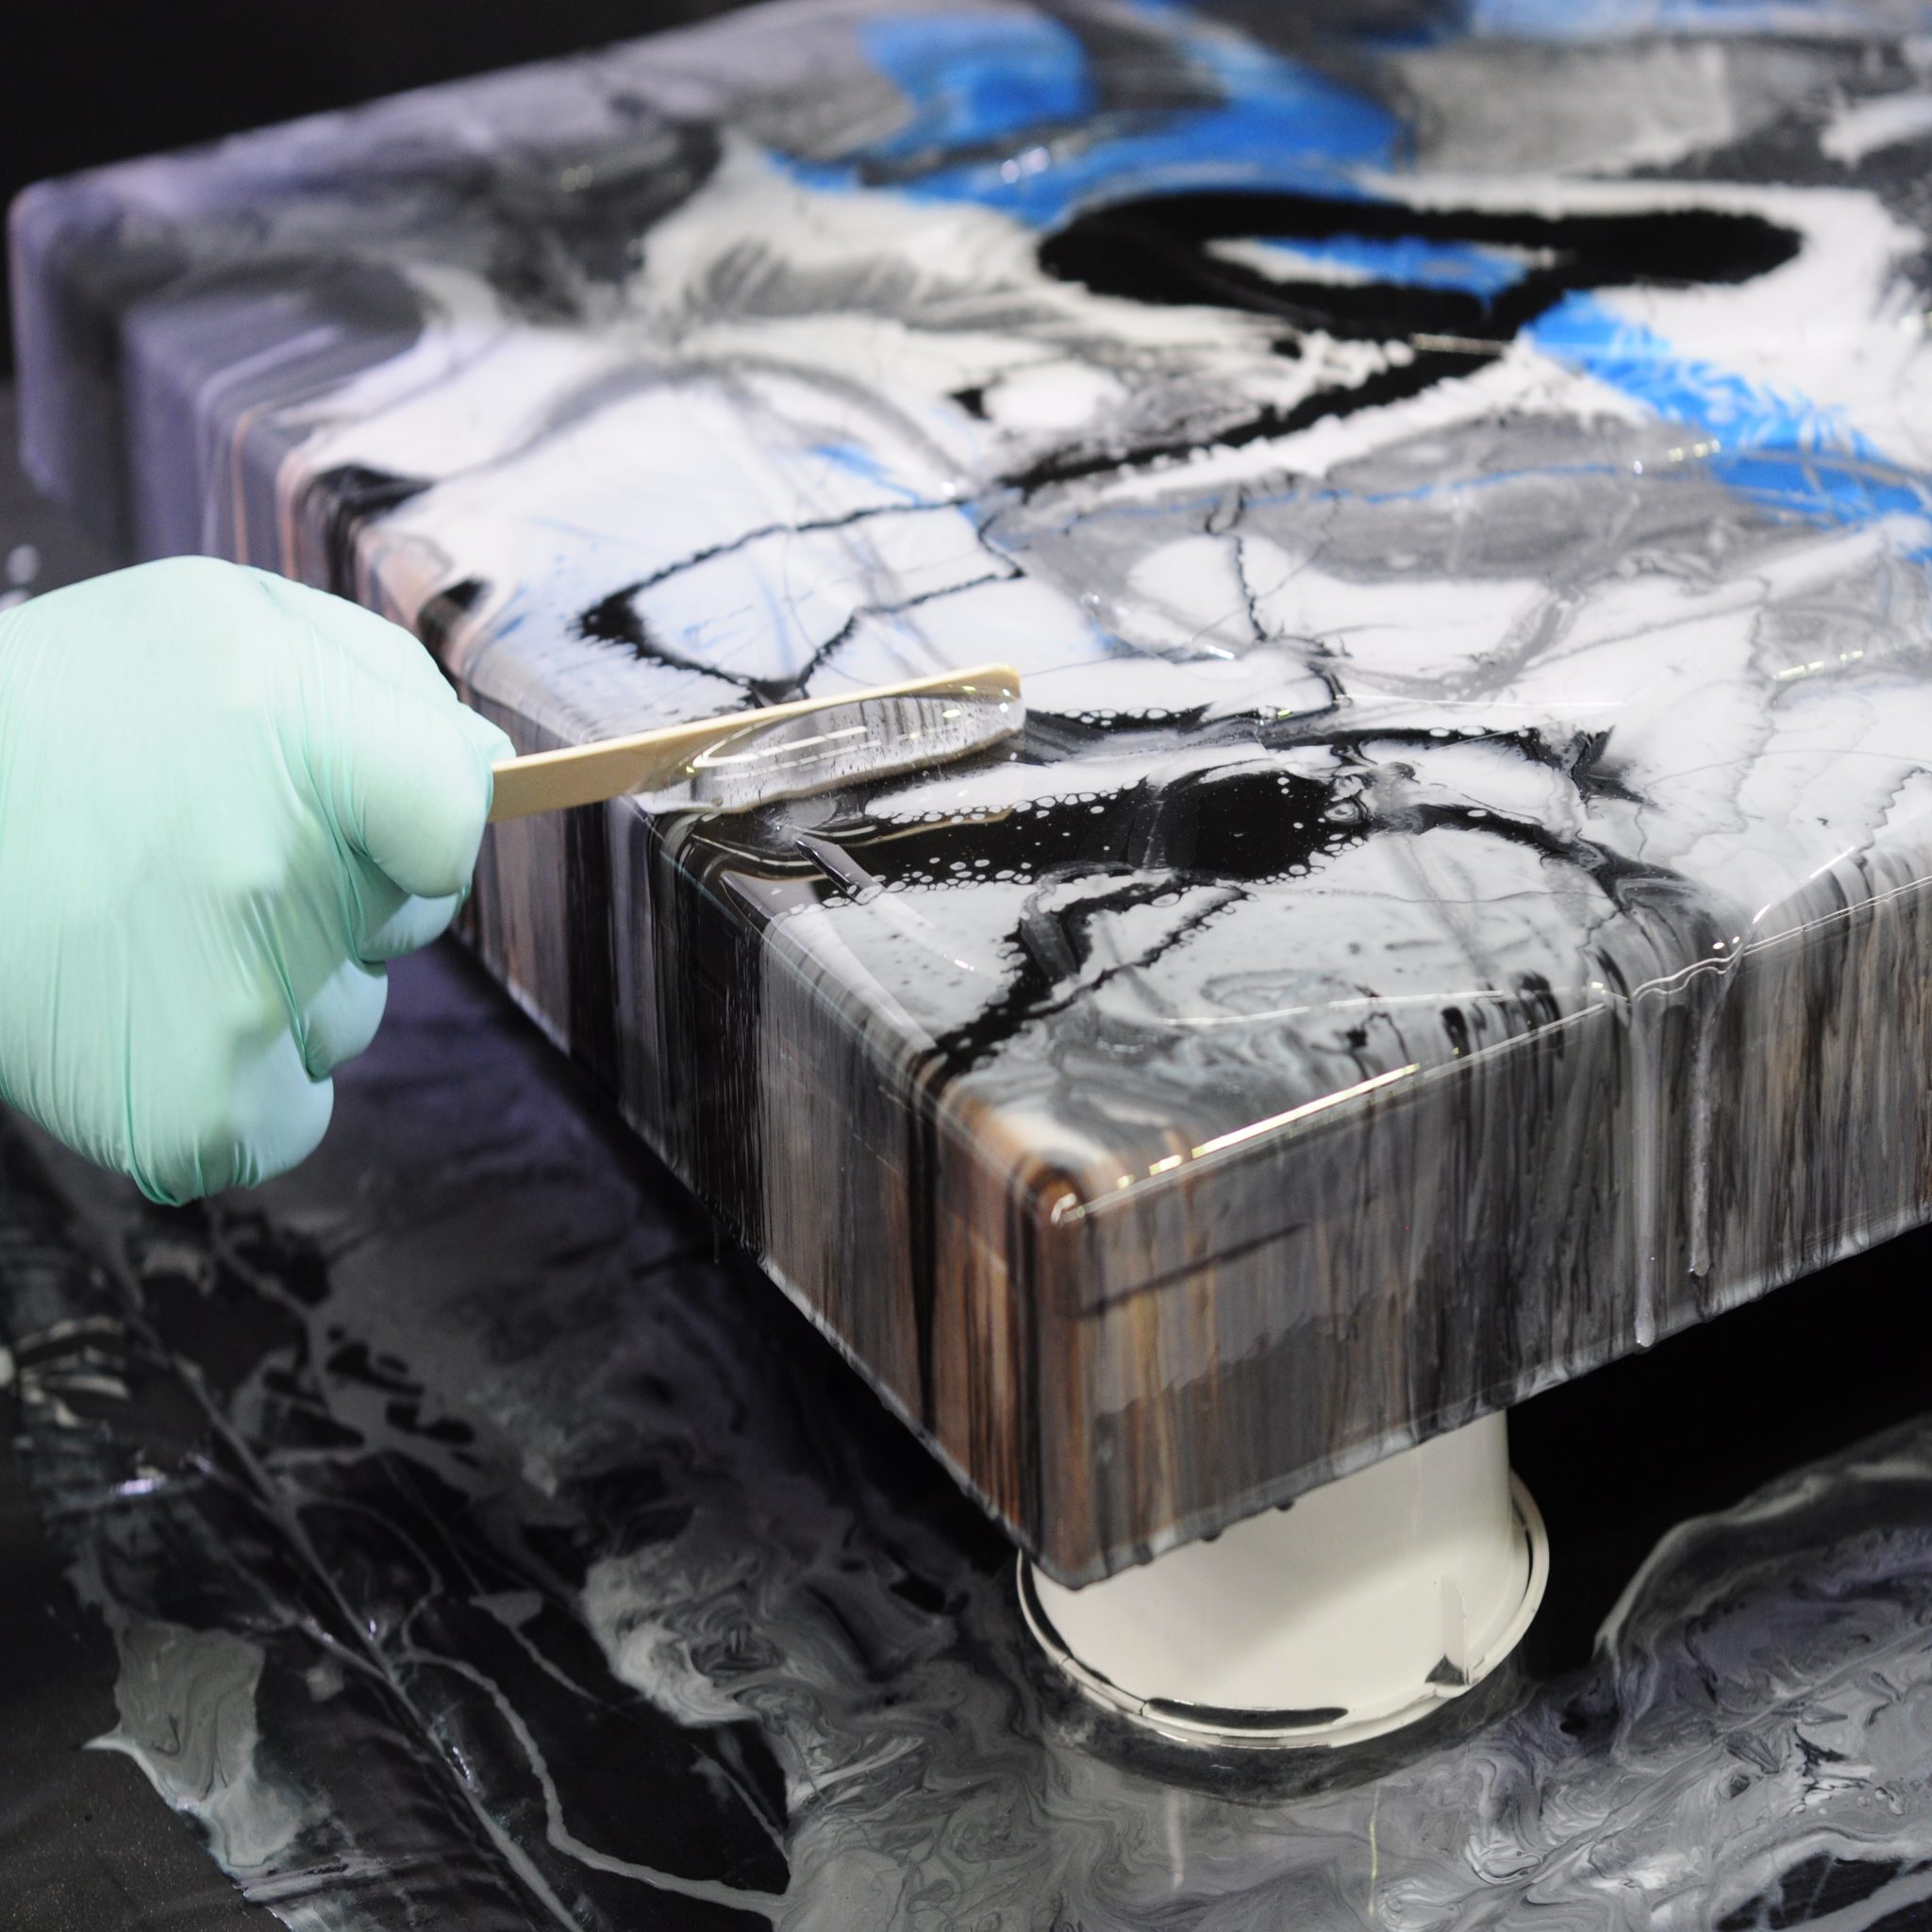
Pour the pigmented resin onto the artboard. We recommend you start with the dominant or background colour. You can use a tongue depressor to spread the resin and cover the artboard, and to draw the colours through the resin.
Use the heat gun to move the resin across the board, and to release any surface tension. This removes bubbles from your resin artwork. Always keep the heat gun moving and well above the surface of the resin to avoid overheating or ignition.
Curing
Your resin artwork won’t cure for 24-36 hours, longer if the temperature is below 18°C. Avoid working in high humidity as this may leave an unwanted finish on the surface and ruin your art. You may like to cover your artwork with a cardboard box to ensure no dust particles land on your artwork.
What’s next?
Loved using Barnes Epoxyglass? Did you know you can use it as a coating on decorative homewares and to dome over polymer clay? Ask our friendly staff in-store, or email [email protected] for product support and technical information.